

Prep Time: 10 minutes
Rising Time: 12–18 hours
Cook Time: 40–45 minutes
Total Time: About 13–19 hours
Servings: 8 slices
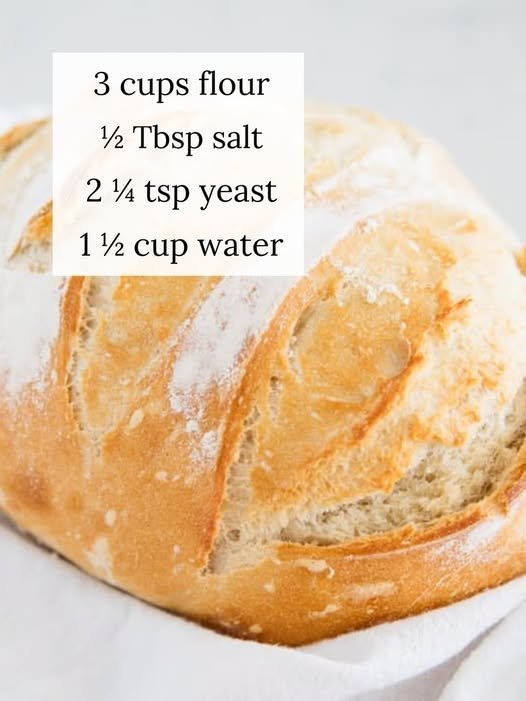
This easy 3-ingredient artisan bread is perfect for anyone who loves homemade crusty bread but doesn’t want to spend hours kneading dough. It has a beautiful golden crust, a soft and chewy center, and those lovely air pockets that make artisan bread so good.
The best part? You don’t need a stand mixer, bread machine, or any special kneading technique. Just mix three simple ingredients, let the dough rest overnight, shape it, and bake.
Ingredients
- 3 cups (375 g) all-purpose flour or bread flour
- 1½ cups (360 ml) warm water
- 1 teaspoon instant yeast
That’s it! No sugar, butter, milk, or oil needed.
Equipment
- Large mixing bowl
- Wooden spoon or spatula
- Clean kitchen towel or plastic wrap
- Dutch oven with lid
- Parchment paper
- Sharp knife or bread lame
Instructions
Step 1: Mix the Dough
Add the flour and instant yeast to a large mixing bowl. Stir them together until evenly combined.
Pour in the warm water and mix with a wooden spoon until everything comes together into a rough, sticky dough.
Don’t worry if the dough looks messy. It should be sticky and shaggy rather than smooth. There is no need to knead it.
Step 2: Let the Dough Rise
Cover the bowl with plastic wrap or a clean kitchen towel.
Leave the dough at room temperature for 12–18 hours.
During this time, the yeast will work slowly and develop flavor. The dough should become bubbly, airy, and noticeably larger.
For the best results, leave it somewhere away from direct sunlight or excessive heat.
Step 3: Shape the Bread
Lightly flour your countertop and gently turn the dough out onto it.
Sprinkle a little flour over the dough to make it easier to handle.
Fold the edges toward the center a few times to create a round loaf.
Turn the dough seam-side down and gently shape it into a ball. Avoid pressing out all the air bubbles.
Place it on a piece of parchment paper and let it rest for about 30–45 minutes.
Step 4: Preheat the Oven
Place a Dutch oven with its lid inside your oven.
Preheat the oven to 450°F (230°C) for approximately 30 minutes.
Heating the Dutch oven helps create a hot baking environment that gives the bread its beautiful artisan-style crust.
Step 5: Score the Dough
Using a sharp knife or bread lame, make one deep slash across the top of the dough.
This allows the bread to expand properly while baking and creates that classic artisan bread appearance.
Step 6: Bake the Bread
Carefully remove the hot Dutch oven from the oven.
Lift the dough using the parchment paper and place it inside the Dutch oven.
Cover with the lid and bake for 30 minutes.
Remove the lid and continue baking for another 10–15 minutes, or until the bread develops a deep golden-brown crust.
Step 7: Cool Before Slicing
Remove the bread from the Dutch oven and transfer it to a wire cooling rack.
Allow it to cool for at least 45–60 minutes before slicing.
This step is important because the inside of the bread continues to set as it cools.
Recipe Tips for Perfect Artisan Bread
Use the right water temperature: Lukewarm water is ideal. Avoid very hot water because it can damage the yeast.
Don’t add too much flour: The dough should remain sticky. Adding too much flour can make the finished bread dense.
Be patient with rising: Slow fermentation gives the bread a better flavor and texture.
Don’t skip preheating: A properly heated Dutch oven helps create a crisp crust.
Let it cool completely: Cutting too early can leave the inside gummy.
How to Store Artisan Bread
- Room temperature: Store in a paper bag or bread box for 2–3 days.
- Refrigerator: Refrigeration is not recommended because it can make bread go stale faster.
- Freezer: Slice the cooled bread and freeze in an airtight freezer bag for up to 3 months.
To enjoy frozen slices, toast them directly from frozen or allow them to thaw at room temperature.
What to Serve With 3-Ingredient Artisan Bread
This homemade bread tastes wonderful with many different foods.
- Butter and homemade fruit jam
- Olive oil and balsamic vinegar
- Creamy tomato soup
- Garlic butter
- Scrambled eggs
- Cheese and fresh vegetables
- Homemade chicken soup
- Avocado and poached eggs
Frequently Asked Questions
1. Can I make artisan bread without kneading?
Yes! This recipe uses a long resting period instead of traditional kneading. The flour absorbs the water, and fermentation helps develop the dough’s structure.
2. Can I use bread flour instead of all-purpose flour?
Absolutely. Bread flour contains more protein and can give the loaf a slightly chewier texture.
3. Why is my dough so sticky?
Sticky dough is completely normal for this recipe. It has a high water content, which helps create an airy interior.
4. Can I make this bread without a Dutch oven?
Yes. Place the dough on a parchment-lined baking sheet or in a preheated oven-safe pot. Add a separate oven-safe pan with hot water to create steam during the first part of baking. The crust may be slightly different.
5. How do I know when the bread is done?
The crust should be deep golden brown. The center should reach approximately 200–210°F (93–99°C) when checked with an instant-read thermometer.
6. Can I prepare the dough overnight?
Yes! Overnight fermentation is one of the easiest ways to prepare this bread. Mix the dough in the evening and bake it the following day.
7. Can I add herbs or cheese?
Yes. Although the basic recipe uses only three ingredients, you can add rosemary, shredded cheese, olives, or other favorite additions for different flavors.
Nutrition Information
Estimated per serving, based on 8 servings.
| Nutrient | Amount |
|---|---|
| Calories | 175 kcal |
| Carbohydrates | 36 g |
| Protein | 5 g |
| Fat | 0.5 g |
| Fiber | 1.2 g |
| Sugar | 0.1 g |
| Sodium | 3 mg |
Nutrition values are estimates and may vary depending on the flour used.
Final Thoughts
Making homemade artisan bread doesn’t have to be complicated. With just three basic ingredients and no kneading, you can make a beautiful loaf with a crispy golden crust and a soft, chewy center.
This recipe is perfect for busy days, beginner bakers, and anyone who wants fresh homemade bread without a lot of work. Once you try it, you may find yourself making it every week!
Save this recipe and give it a try. Your kitchen will smell amazing! 🥖