
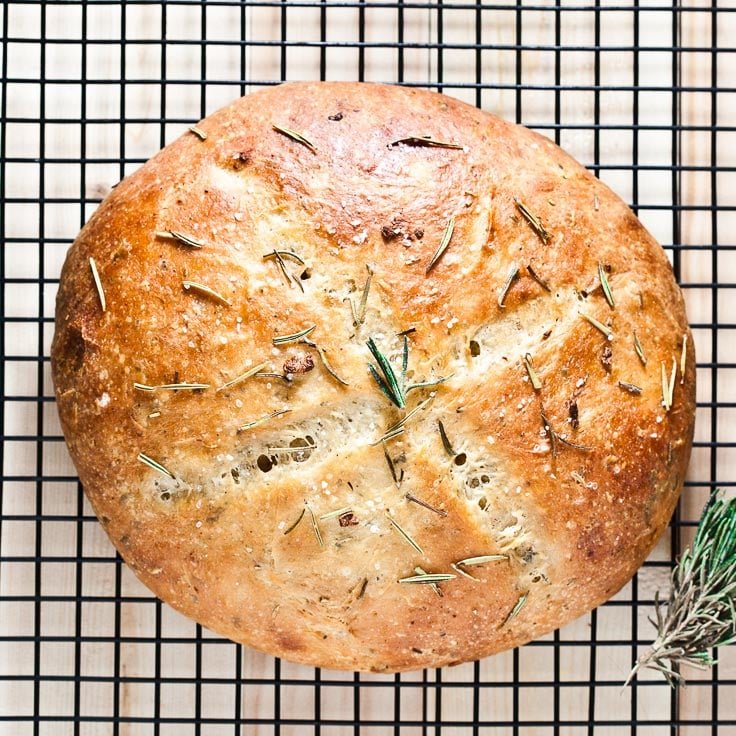

Absolutely — here’s a complete, easy-to-follow recipe for Rustic No-Knead Rosemary Garlic Sourdough Bread. It has a crisp, golden crust, a soft chewy crumb, and plenty of rosemary-garlic flavor without requiring traditional kneading.
Recipe Overview
Prep Time: 20 minutes
Rest/Fermentation: 10–16 hours
Bake Time: 45–50 minutes
Total Time: About 12–17 hours
Yield: 1 large loaf
Difficulty: Easy
🥖 Ingredients
- 100 g active sourdough starter
- 350 g warm water
- 500 g bread flour
- 10 g fine sea salt
- 2 tablespoons fresh rosemary, finely chopped
- 4–5 garlic cloves, finely minced
- 1 tablespoon olive oil
- 1 teaspoon honey or maple syrup, optional
- Extra flour, for shaping
- A little olive oil or parchment paper for baking
👩🍳 Instructions
1. Mix the Dough
Add the active sourdough starter and warm water to a large mixing bowl. Stir until the starter is mostly dissolved.
Add the bread flour, salt, chopped rosemary, minced garlic, olive oil, and optional honey.
Mix with a wooden spoon or your hands until all the flour is hydrated and a rough, sticky dough forms.
Don’t knead it. The dough will become smoother as it ferments.
2. Rest the Dough
Cover the bowl with a clean kitchen towel or plastic wrap.
Let the dough rest for about 30 minutes at room temperature.
3. Do Gentle Stretch-and-Folds
After the first 30 minutes, wet your hands and grab one side of the dough.
Stretch it upward gently, then fold it over the center.
Turn the bowl and repeat 3–4 times.
Cover and rest for another 30 minutes.
Repeat this process 2–3 more times, roughly every 30 minutes.
You should notice the dough becoming smoother, stronger, and more elastic.
4. Bulk Fermentation
Cover the bowl again and let the dough ferment at room temperature until it becomes noticeably puffy and increases in size by roughly 50–75%.
Depending on the temperature and strength of your starter, this can take approximately 4–8 hours.
Don’t rely only on the clock. Look for bubbles around the sides and a dough that feels airy and slightly jiggly.
5. Shape the Loaf
Lightly flour your work surface.
Gently turn the dough out onto the surface.
Shape it into a round boule by folding the edges toward the center and then gently pulling the dough toward you to create surface tension.
Avoid pressing out all the air.
Place the shaped dough seam-side up into a well-floured banneton or a bowl lined with a heavily floured kitchen towel.
6. Cold Proof
Cover the dough and place it in the refrigerator for 8–12 hours, preferably overnight.
This slow fermentation improves both flavor and texture.
7. Preheat the Oven
Place a Dutch oven with its lid inside the oven.
Preheat to 450°F (230°C) for at least 30–45 minutes.
A properly heated Dutch oven helps create the beautiful crust and oven spring associated with sourdough.
8. Score the Bread
Carefully turn the cold dough onto a piece of parchment paper.
Dust the surface lightly with flour if desired.
Use a sharp bread lame or razor blade to make one deep slash across the top.
You can also add a few smaller decorative cuts.
9. Bake
Carefully lower the dough into the hot Dutch oven.
Cover with the lid and bake for 25 minutes.
Remove the lid and reduce the temperature to 425°F (220°C).
Bake for another 18–25 minutes, or until the crust is deeply golden brown.
For a darker, extra-crispy crust, give it a few additional minutes.
10. Cool Completely
Transfer the bread to a wire rack.
Let it cool for at least 1 hour before slicing.
I know it’s tempting to cut into it immediately, but allowing the loaf to cool helps the crumb finish setting and prevents it from becoming gummy.
🧄 Tips for the Best Rosemary Garlic Sourdough
Use active starter: Your starter should be bubbly, active, and able to rise well after feeding.
Don’t add too much garlic: Fresh garlic contains moisture and can affect fermentation. Stick close to the recommended amount.
For stronger rosemary flavor: Add another teaspoon or two of finely chopped fresh rosemary.
For roasted garlic flavor: Roast the garlic until soft and golden, cool it completely, then gently squeeze it into the dough. This gives the bread a sweeter, milder garlic flavor.
Watch your dough, not just the clock: Fermentation times vary significantly depending on room temperature and starter strength.
Don’t skip the preheat: A thoroughly heated Dutch oven gives the dough better oven spring and a crispier crust.
🥪 How to Serve It
This rustic loaf is especially good sliced thick and served with:
- Salted butter
- Olive oil and balsamic vinegar
- Cream cheese
- Soup or stew
- Scrambled or fried eggs
- Grilled chicken
- Roasted vegetables
- Cheese and charcuterie
It’s also fantastic toasted with a little butter while the rosemary and garlic warm up again.
🧊 Storage
Keep the cooled bread at room temperature in a paper bag or wrapped loosely in a clean kitchen towel for 2–3 days.
For longer storage, slice the bread and freeze it in an airtight freezer bag for up to 3 months.
Toast slices directly from frozen whenever you want fresh-tasting sourdough.
⭐ Final Thoughts
This Rustic No-Knead Rosemary Garlic Sourdough Bread is a great choice when you want homemade artisan bread without spending time kneading dough. The long fermentation develops a naturally tangy sourdough flavor, while fresh rosemary and garlic give every slice a savory, aromatic finish.
The best part is that most of the work is simply mixing, resting, folding, and waiting. Once you get comfortable with the dough, this can easily become one of those homemade breads you make again and again.